KodeKloud Engineer Day 16: Install and Configure Nginx as Load Balancer
Overview
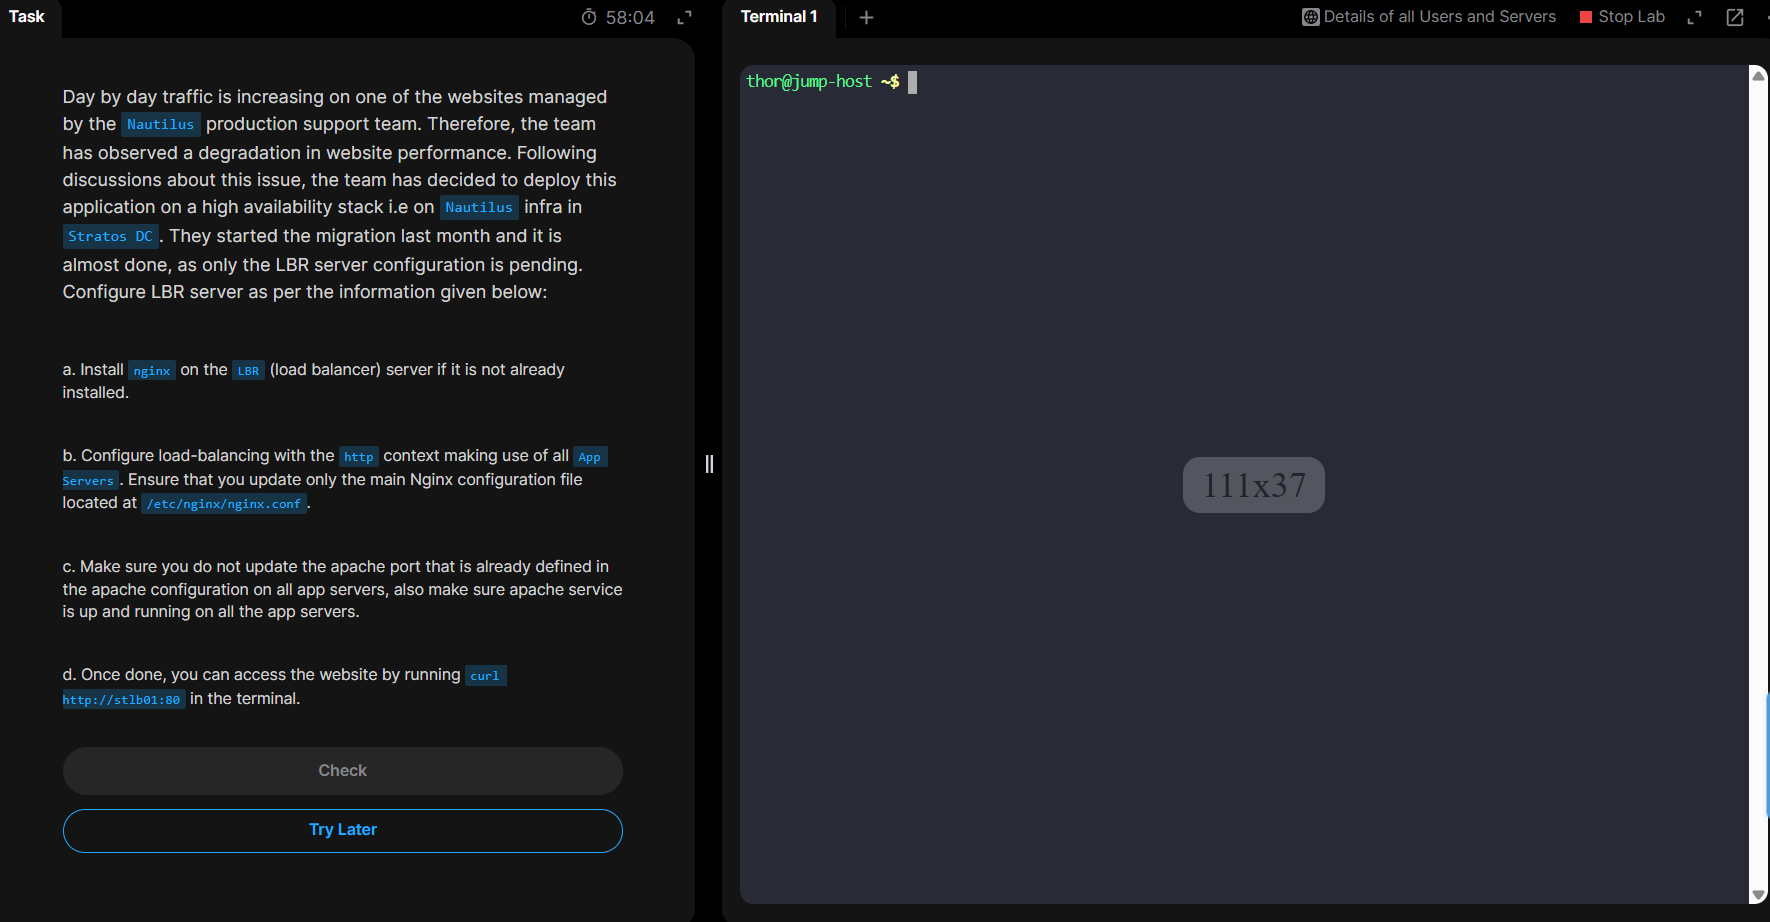
This guide walks you through configuring Nginx as a load balancer for the Nautilus infrastructure in the KodeKloud Engineer platform. You'll learn how to distribute traffic across multiple application servers using Nginx reverse proxy capabilities.
Prerequisites
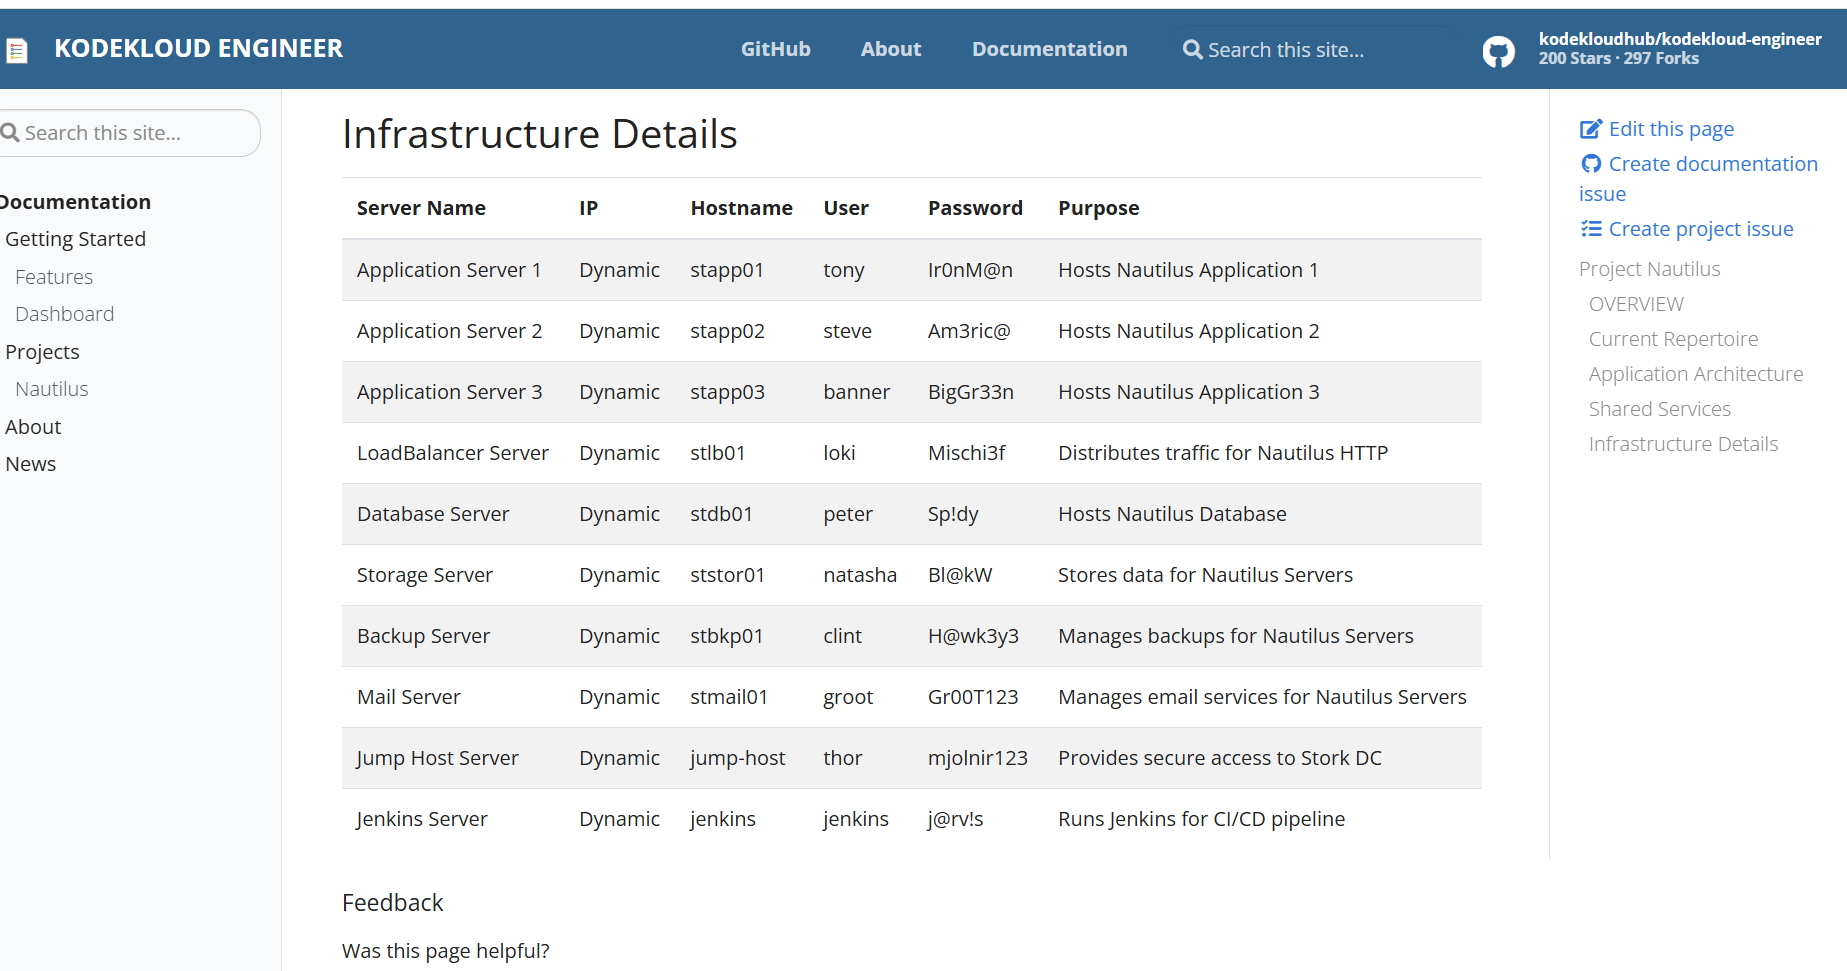
Before starting this lab, familiarize yourself with the infrastructure:
- Reference Documentation: Nautilus Infrastructure Details
- Three Application Servers (stapp01, stapp02, stapp03)
- One Load Balancer Server (stlb01)
- All running on the Nautilus infrastructure
Step 1: Verify Application Servers
First, check that each Application Server is running Apache HTTP Server on the correct ports.
Access App Server 1
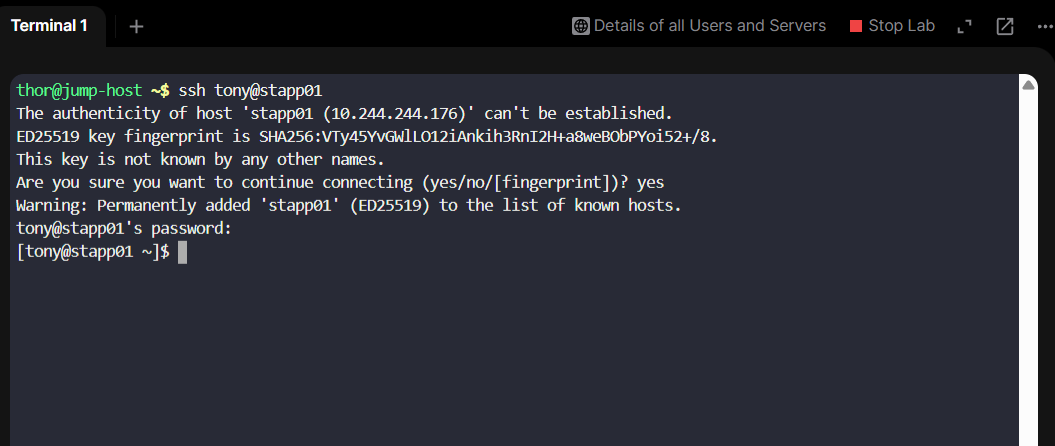
Connect to the first application server:
ssh tony@stapp01When prompted:
- Type
yesto accept the host key - Enter password when prompted:
Ir0nM@n
Verify Apache Status
Check if Apache HTTP Server is running:
sudo systemctl status httpd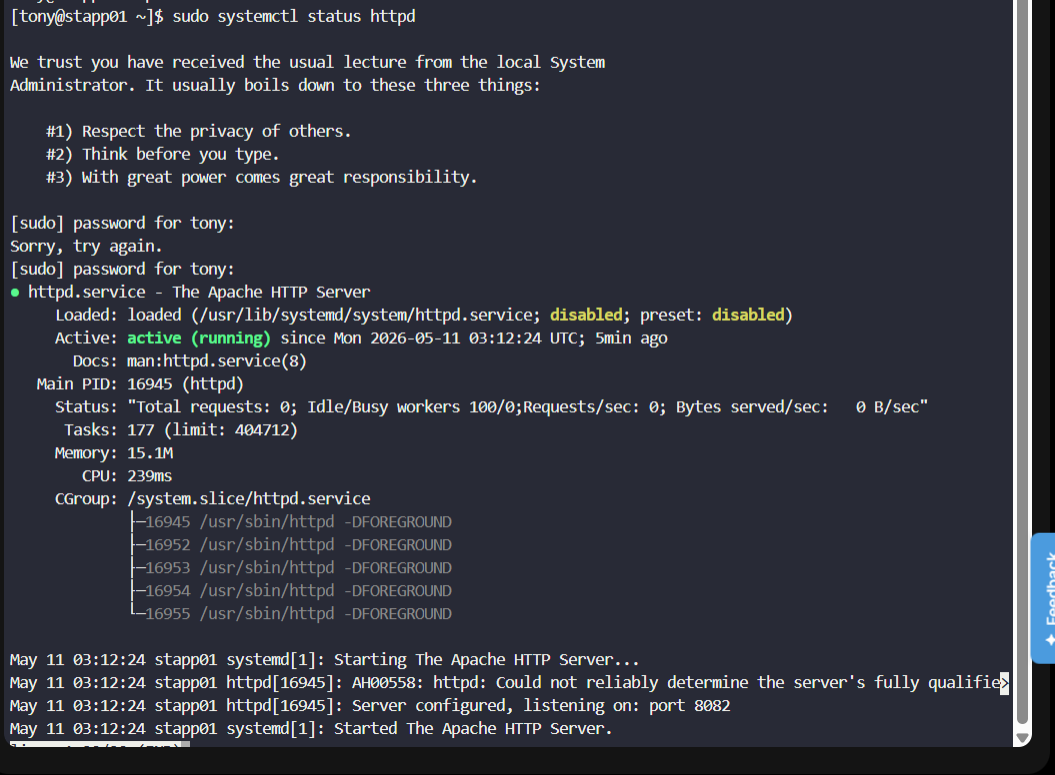
You should see active (running) status, indicating Apache is operational.
Check Apache Port Configuration
Find which port Apache is listening on:
sudo ss -tulnp | grep httpd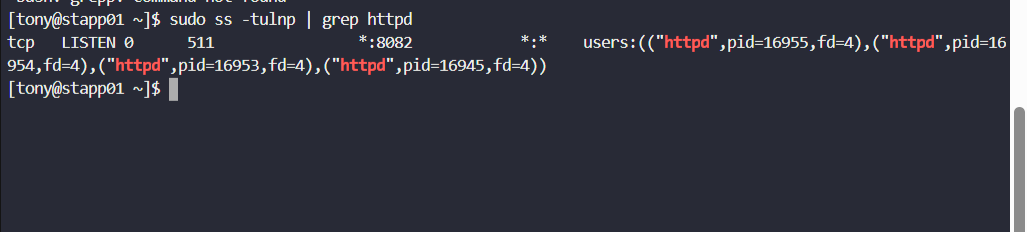
Important: Note that httpd is listening on port 8082. The same applies to stapp02 and stapp03.
Exit the SSH session:
exit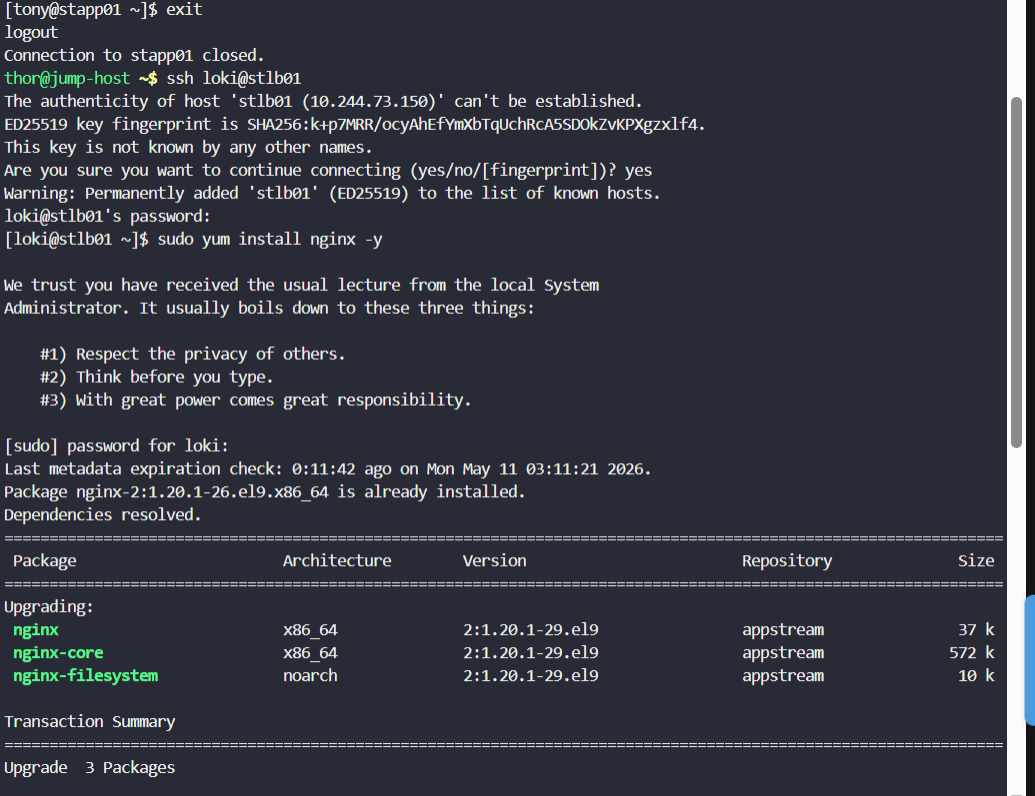
Step 2: Install Nginx on Load Balancer
Connect to the load balancer server and install Nginx:
# SSH into the load balancer (password: Mischi3f)
ssh loki@stlb01

# Install Nginx
sudo yum install -y nginx

# Verify installation
sudo systemctl status nginx

# Enable Nginx to start on boot
sudo systemctl enable nginx

# Start Nginx
sudo systemctl start nginx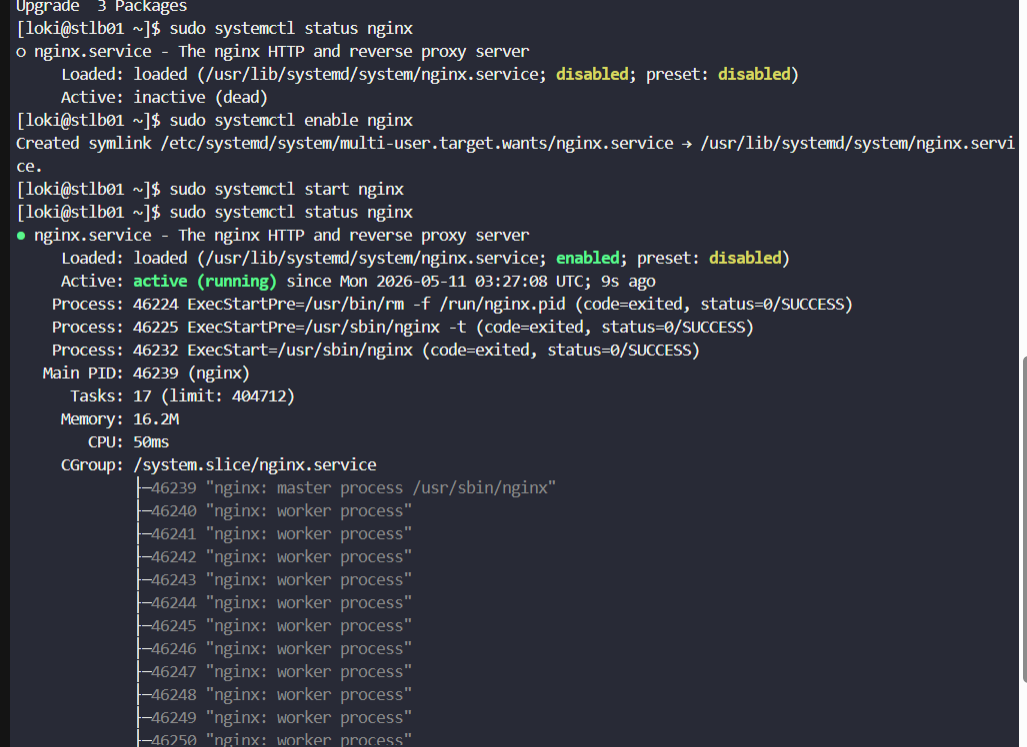
Nginx is now installed and running on the load balancer server.
Step 3: Configure Nginx Load Balancer
Modify Nginx Configuration File
The main Nginx configuration file is located at /etc/nginx/nginx.conf. We need to modify it to add load balancing rules.
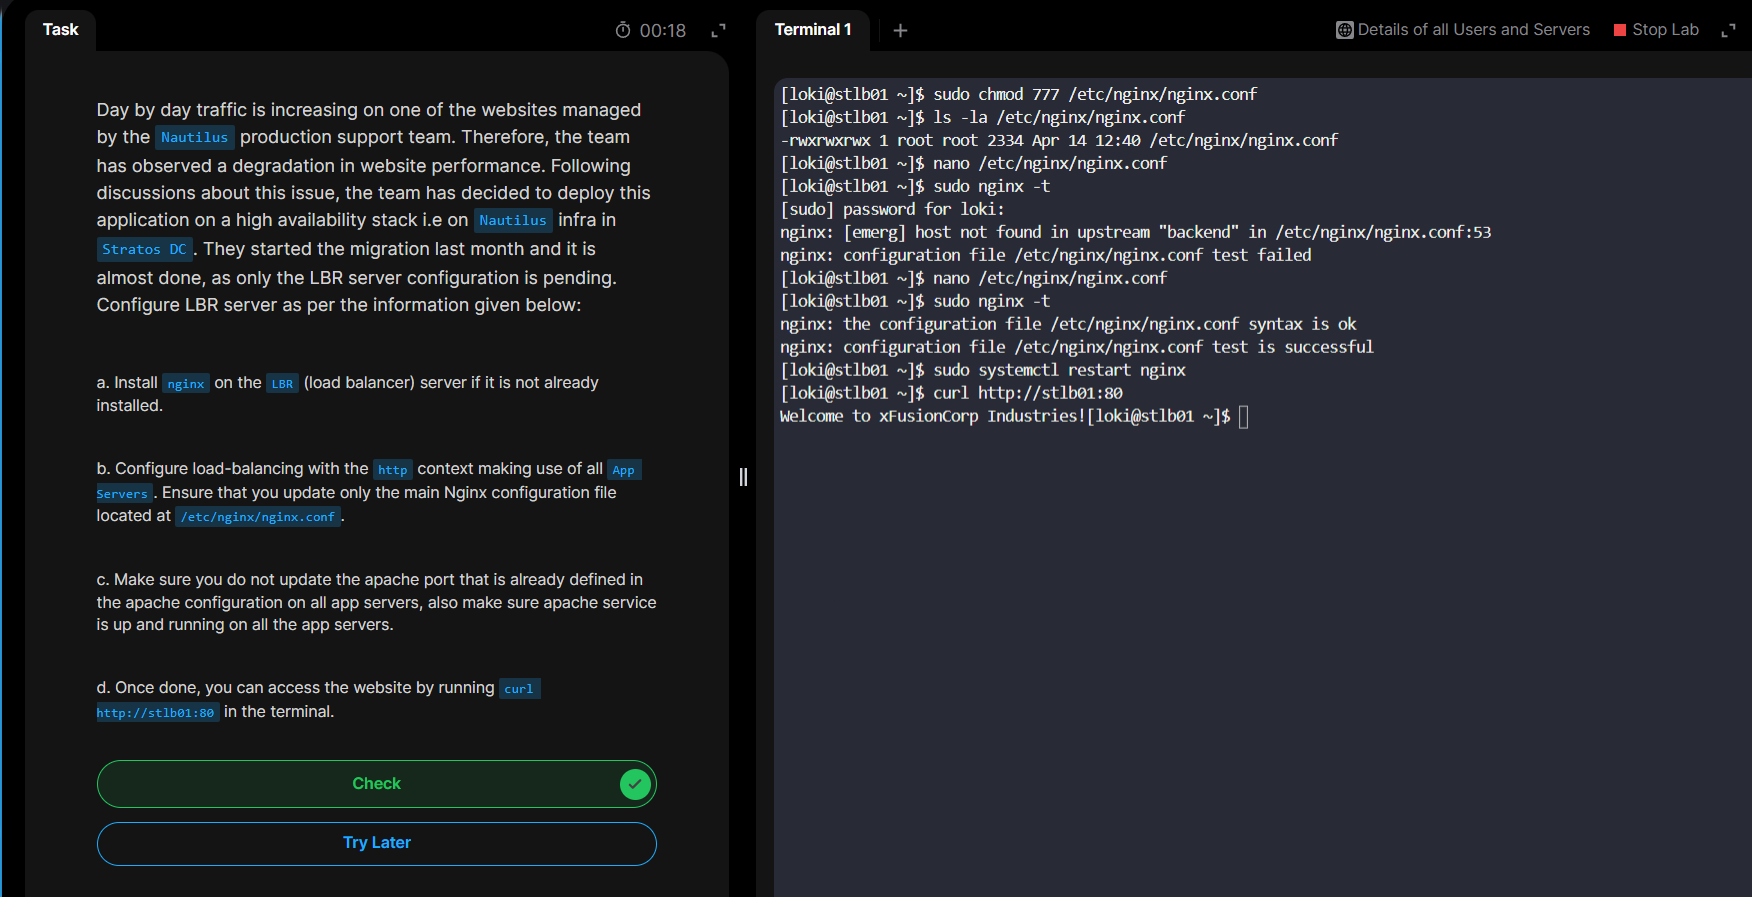
First, change file permissions:
# Allow editing of the nginx.conf file
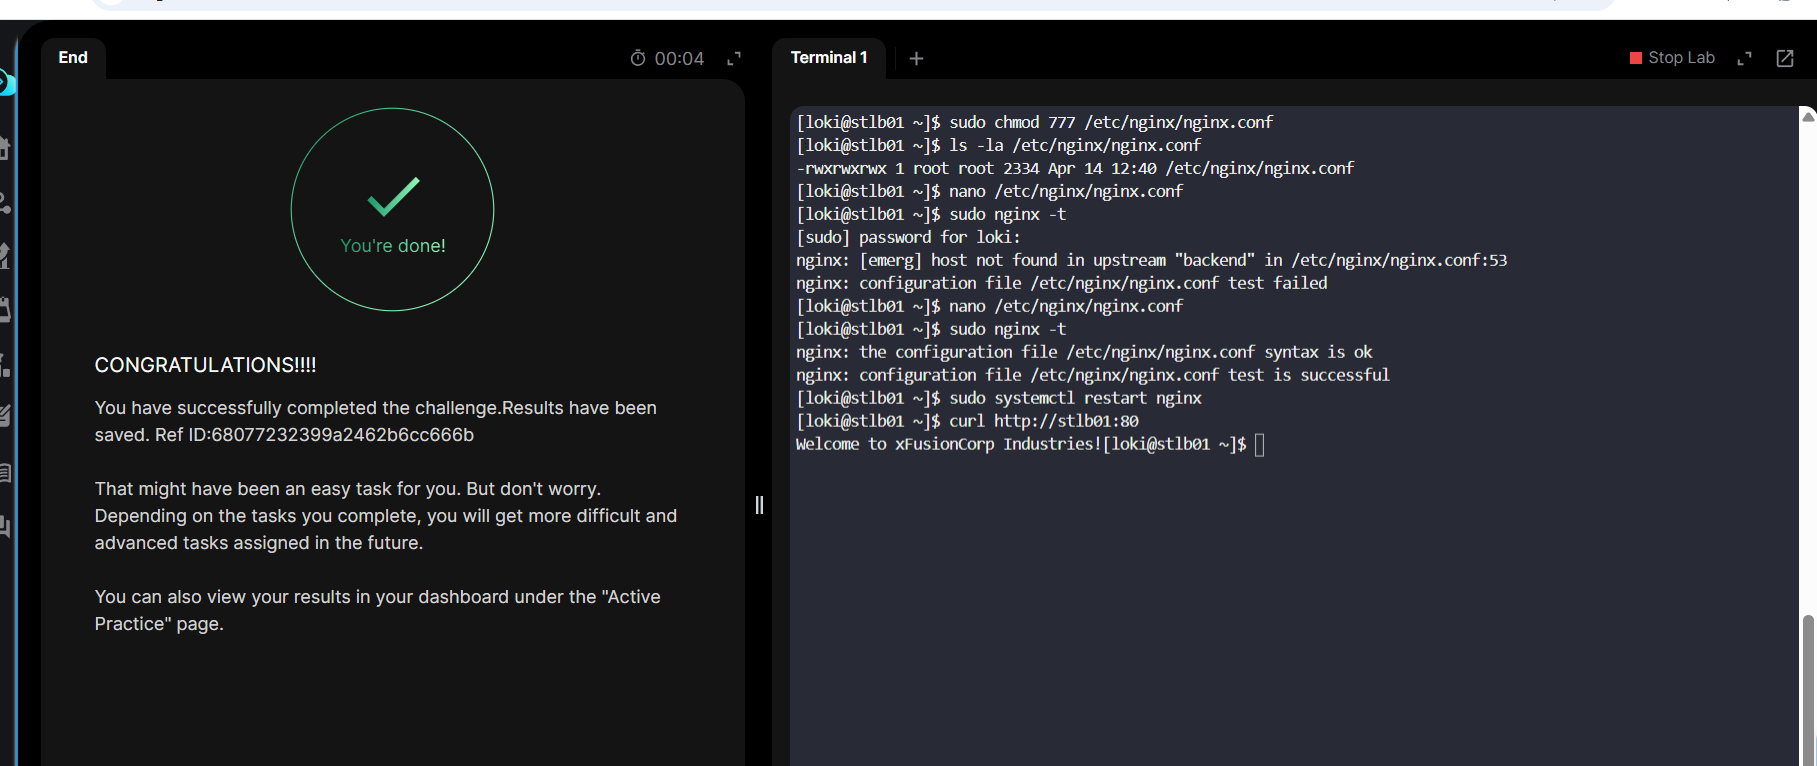
sudo chmod 777 /etc/nginx/nginx.conf
# Verify the permissions were changed
ls -la /etc/nginx/nginx.conf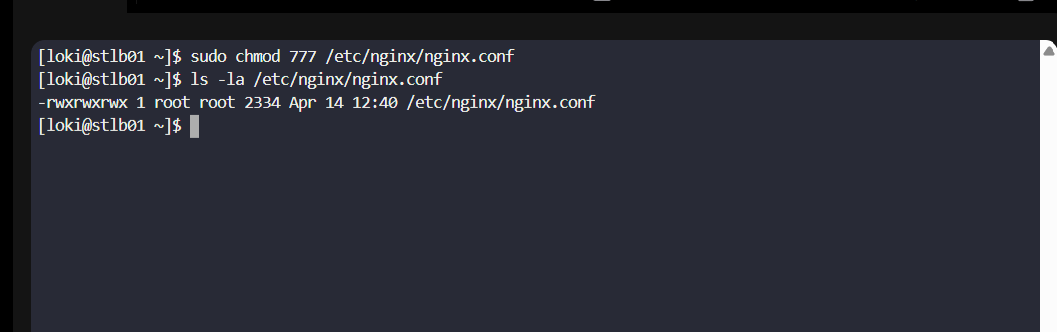
Edit the Configuration
Open the Nginx configuration file in nano:
sudo nano /etc/nginx/nginx.conf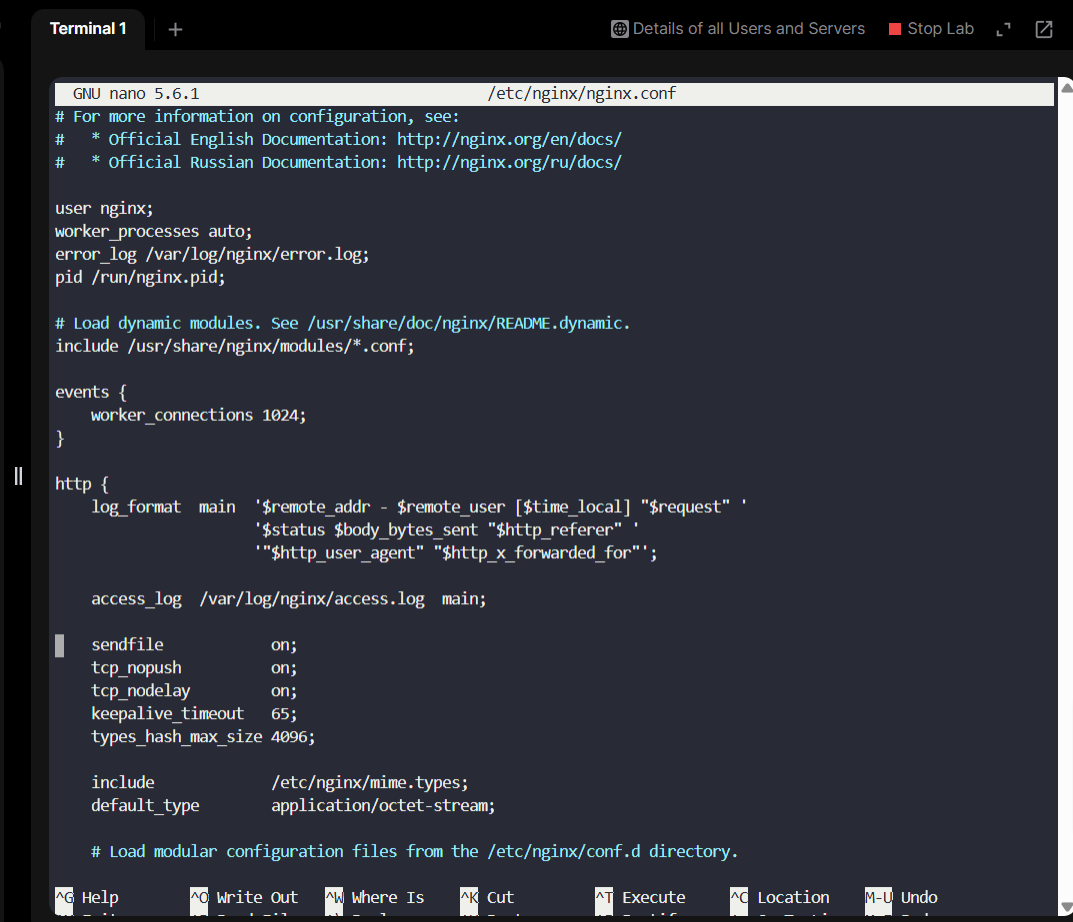
Configure Upstream Servers
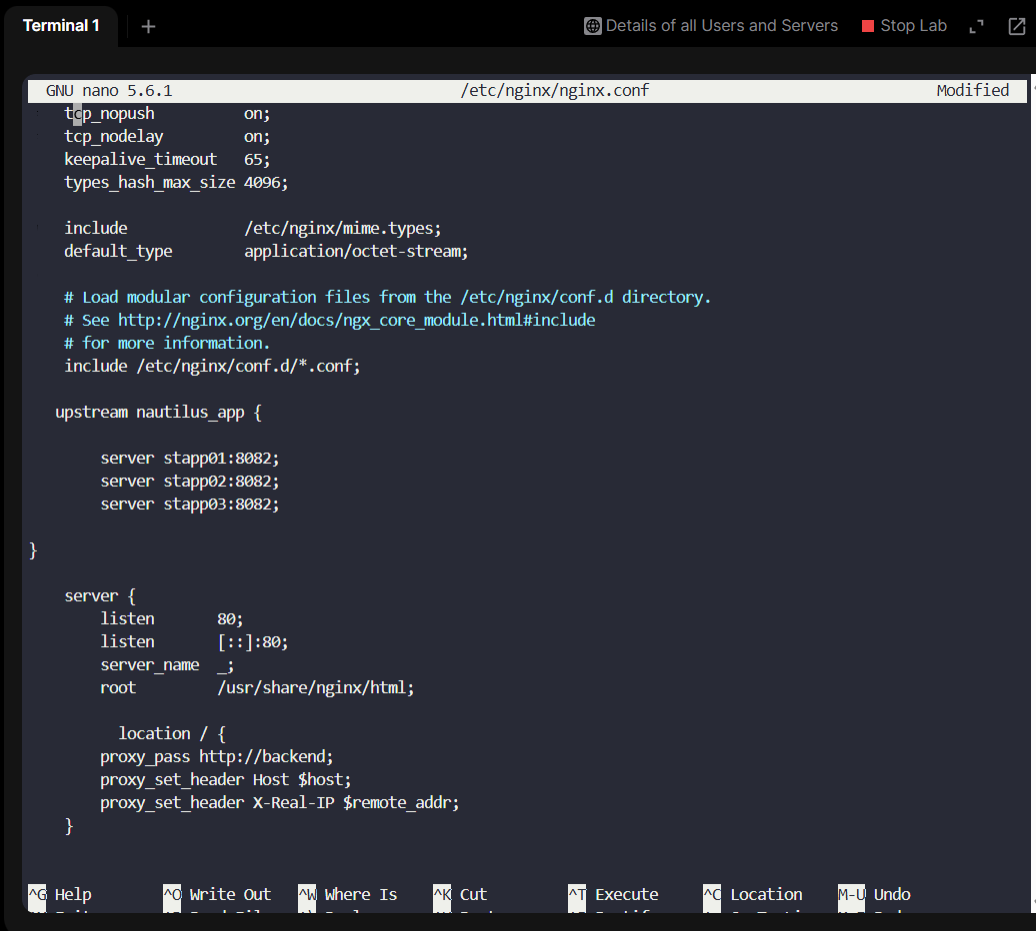
Navigate to the http {} block and add an upstream group. Add the following configuration:
http {
    # Define upstream server group for load balancing
    upstream nautilus_app {
        server stapp01:8082;
        server stapp02:8082;
        server stapp03:8082;
    }

    server {
        listen       80;
        listen       [::]:80;
        server_name  _;
        root         /usr/share/nginx/html;

        # Proxy requests to upstream group
        location / {
            proxy_pass http://nautilus_app;
            proxy_set_header Host $host;
            proxy_set_header X-Real-IP $remote_addr;
        }
    }
}
Configuration Explanation:
upstream nautilus_app: Defines a group of backend serversserver stapp0X:8082: Each application server with its listening portlocation /: Matches all incoming requestsproxy_pass http://nautilus_app: Forwards requests to the upstream group (load balanced)proxy_set_header: Preserves client information in proxy headers
Save and Exit
Save the configuration file:
- Press
Ctrl + Sto save - Press
Ctrl + Xto exit nano
Verify and Apply Configuration
Test the Nginx configuration syntax:
# Test configuration syntax
sudo nginx -t

# Restart Nginx to apply changes
sudo systemctl restart nginx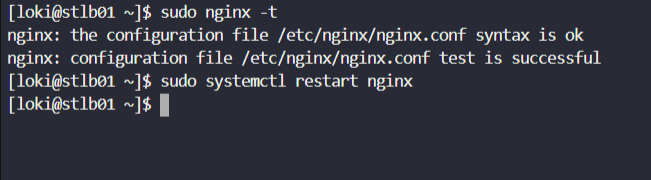
You should see:
nginx: the configuration file /etc/nginx/nginx.conf syntax is ok
nginx: configuration file /etc/nginx/nginx.conf test is successful
Step 4: Verify Load Balancer
Test the load balancer by accessing it from the terminal:
curl http://stlb01:80
If you receive the response:
Welcome to xFusionCorp Industries!Congratulations! 🎉 You have successfully configured Nginx as a load balancer!
Summary
In this lab, you:
- ✅ Verified application servers were running Apache on port 8082
- ✅ Installed Nginx on the load balancer server
- ✅ Configured upstream servers for load balancing
- ✅ Set up proxy pass rules to distribute traffic
- ✅ Tested the load balancer configuration
The Nginx load balancer is now actively distributing incoming HTTP requests across the three application servers in a round-robin fashion, providing high availability and improved performance for the Nautilus infrastructure.
Key Concepts
Load Balancing
Load balancing distributes network traffic across multiple servers to improve:
- Availability: If one server fails, others handle the traffic
- Performance: Requests are distributed based on server capacity
- Scalability: Easy to add or remove backend servers
Nginx Upstream
The upstream directive defines a group of servers. Nginx uses round-robin by default to distribute requests equally among healthy servers.
Reverse Proxy
A reverse proxy like Nginx intercepts client requests and forwards them to backend servers, hiding the backend architecture from clients.
Interactive Infra Pipeline Map
Rê chuột vào các node hạ tầng để khám phá các bài lab và dự án liên quan. Các node nhấp nháy đại diện cho chủ đề của bài viết này.
💻 Automation
🏗️ IaC
☁️ Compute
🛡️ Security
🗄️ Database
📊 Monitoring
Tác giả
EurusDevSecSinh viên IT đam mê DevSecOps, Cloud & Linux. Thích học hỏi công nghệ mới và viết blog chia sẻ.
Bình luận (0)
Chưa có bình luận. Hãy là người đầu tiên!